DIY TV Lift: Motorized TV Mount for Your Home
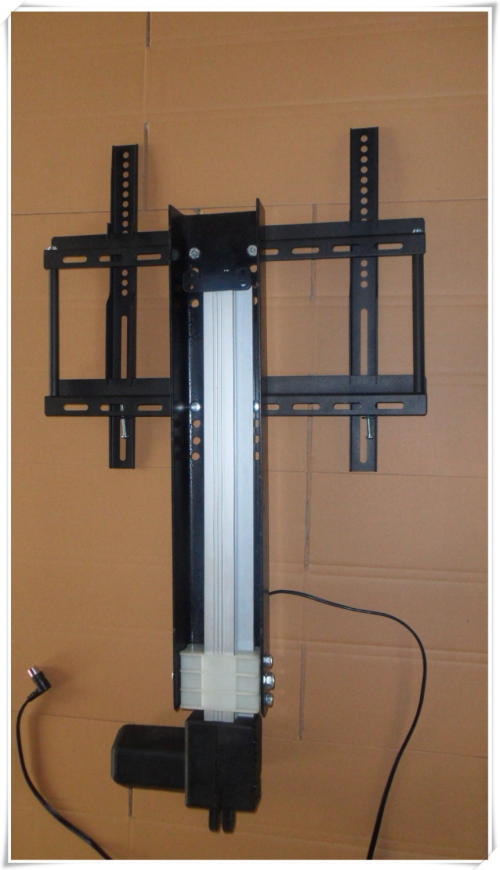
1. Select A Linear Actuator
The first thing that you have to consider is choosing the right linear actuator that will be needed for your television. It means that you have to consider the size of your television, the design of the room where you want to install your television set-up, and the kind of set-up you want to build. You must greatly consider your style in choosing the kind of linear actuator that you will use. Most designs are available for ordering on the Internet so you can check them out and choose whichever you want the most. A switch can easily control your actuator so you can easily set or retire your television.
2. Select A Remote Switch (Optional)
You can use a remote switch to up and down the TV lift. It will be little tricky to choose and set-up a right switch so you may need an electrician.
3. Select the Right Place for your TV Lift
After choosing your linear actuator, the next thing to do is choosing the style and location of your actuator. The main things that you would have to consider in installing your actuators are design, efficiency, and the location where it will be inside your house. Setting your actuator is best done in a hidden manner, by hiding your actuator, you are not hindering or disturbing the design of your home. You can easily achieve this by choosing a cabinet, a table, or a wall, which will function as the base/foundation of your actuator. You can then easily design it so that it will be beautifully presentable. You should already be able to create your set-up by making use of small operable doors or automatic set-ups which will allow you to hide your television from plain view when not in use.
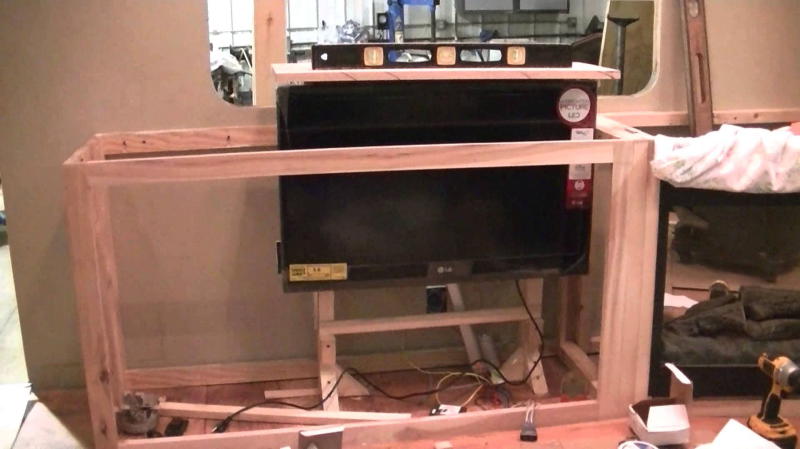
4. Installation of Motorized TV Mount
With your actuator and location ready, the installation is now next. This one is the most important step. In installing your actuator, you must get all measurements accurately and meticulously so that you can easily screw the parts precisely where it needs to go. Use custom sized pieces of wood to anchor and support your actuator into place. Make sure that the actuator is set to be visually hidden from view when the TV is later installed. Position your actuator so that the strut is set to the topmost of the enclosure when fully extended with the switch. Make sure that your design for your operable door is fully coherent and relative to your set-up of an actuator.
5. Install Your TV
After installing your actuator, you must now install the television. Use a piece of thick plywood as your mounting plate. By using a thick piece of plywood, you are screwing much deeper into a foundation, and this will allow you to stabilize your set-up and secure your television without having fears of it collapsing. After you have installed the mounting plate, you can easily install your television into place. All modern television sets include a back plate where you can screw from or into.
6. Decorate Your Set-Up
The final step for this DIY TV Lift project is, of course, designing. After setting up all the requirements, you may now design your set-up according to your style, and you can paint it so that it may blend in with the overall ambiance of your house or you can also install some decorative lighting to present your set-up with a high-tech feel to it. You can also style your set-up with wood and varnish. The benefits of linear actuators to this project is that you can create your design and that it is easy to use, compact, and efficient. You can create a variety of projects and design to your motorized TV lifts with the use of different linear actuators.